

Table of Contents
- 1. Proper Structural Support and Mounting
- 2. Electrical Planning and Safety Compliance
- 3. LED vs. Neon Illumination Choices
- 4. Weather Sealing and Moisture Protection
- 5. Professional Installation Expertise Matters
- 6. Maintenance and Long-Term Performance
- 7. Permit Navigation and Code Requirements
1. Proper Structural Support and Mounting
Illuminated channel letter signs are among the most effective ways to make your storefront visible day and night. When a prospect walks past your business at 8 p.m., a well-installed illuminated sign tells them you’re open, professional, and worth their attention. But installation isn’t just about mounting letters to a wall. The difference between a sign that looks sharp for five years and one that fails or fades within months comes down to how it’s designed, installed, and maintained from day one.
We work with Dallas business owners who understand that their storefront sign is a long-term investment. Over the years, we’ve learned what separates excellent installations from mediocre ones. This guide covers the seven key practices we follow to ensure every illuminated channel letter installation we complete performs beautifully and lasts.
The structural foundation is where installation quality begins. Illuminated channel letters are heavier than they appear, especially when filled with LED modules or neon tubes. A letter that looks lightweight can easily weigh 20 to 50 pounds or more depending on size and material. Without proper support, gravity and wind pressure will eventually cause the mounting to fail, warping the letters or worse, causing them to fall.
We always start by assessing the mounting surface itself. Brick, concrete, metal studs, and wooden frames each require different fastening approaches. When we’re mounting to brick or masonry, we use expansion anchors or powder-actuated fasteners that grip deep into the material, not just the surface. If the wall is thin metal or composite, we reinforce the back side with backing plates that distribute the load across a wider area.
The bracket design matters just as much as the fasteners. We use heavy-duty aluminum or stainless steel brackets specifically engineered for the weight and wind load of each letter. These brackets are typically mounted every 12 to 18 inches depending on letter size, so a large 3-foot letter gets multiple attachment points rather than relying on a single center mount.
Wind is the silent killer of poor installations. Dallas experiences occasional high winds, and even standard wind loads can strain undersized brackets. We calculate the expected wind load based on your location, building height, and local wind data before we design the support system. This isn’t guesswork; it’s structural engineering applied to signage.
What to do next: Have your current signage assessed by a professional if you’re uncertain about its mounting. Listen for any creaking or movement when wind picks up. If you’re planning new illuminated letters, request a load calculation and bracket specification from your installer before installation begins.
2. Electrical Planning and Safety Compliance
Electrical work on signage is not a shortcut zone. A loose connection or undersized wiring can create fire hazards, cause flickering, or damage expensive LED modules. We treat every illuminated sign installation as an electrical project first and a visual project second.
Modern LED channel letters draw far less power than older neon systems, but they still need proper circuit design. We map out the power run from your building’s electrical panel, calculate the voltage drop across the run, and ensure the wire gauge is adequate for the total amperage. An undersized wire heats up, wastes power, and shortens LED lifespan. If your letters are more than 50 feet from the panel, we often recommend a dedicated transformer or a thicker gauge wire to maintain proper voltage at the letters themselves.
Every circuit we install has its own breaker and disconnect switch. The disconnect allows your maintenance staff to safely power down the sign for cleaning or repairs without having to access the main electrical panel. We also add weatherproof conduit and sealed junction boxes at every connection point so moisture can’t creep into electrical joints.
LED modules generate some heat, but far less than incandescent or neon. However, we still design ventilation into larger installations to prevent heat buildup inside the letter cavities. Poor ventilation can cause LEDs to fail prematurely or push your cooling costs higher than necessary if the sign is mounted near an air-conditioned space.
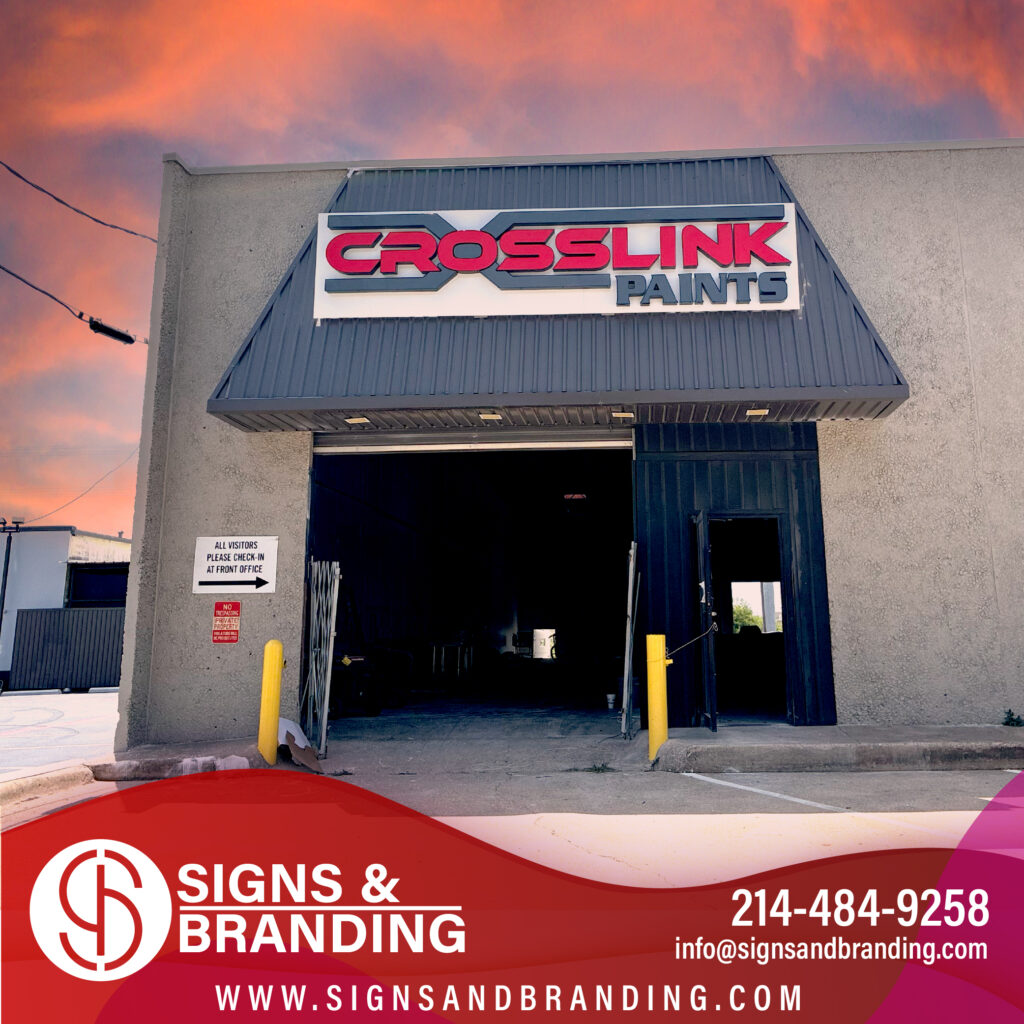
For neon installations (which some customers choose for a specific aesthetic), we work with licensed neon technicians and ensure high-voltage transformers are properly enclosed and labeled. Neon requires extra care around moisture, as the transformers can arc if exposed to condensation.
What to do next: Before your installation, ask your provider for a one-line electrical diagram and a copy of any load calculations. If you’re replacing an older sign with LED, you may discover that your new system requires less electrical capacity, which can save on operating costs.
3. LED vs. Neon Illumination Choices
The choice between LED and neon is primarily about performance, lifespan, and the visual effect you want. Both work, but they’re fundamentally different technologies with different tradeoffs.
LED channel letters dominate the market now, and for good reason. LEDs last 50,000 to 100,000 hours depending on quality, meaning you might get 10 to 15 years of operation before needing replacement modules. They consume a fraction of the power that neon requires, so your electricity bill drops noticeably. LEDs also run cool, tolerate temperature fluctuations well, and are easily dimmed or programmed to change color if you ever want dynamic effects.
The visible difference is subtle but real. LEDs produce a sharp, defined glow with even color saturation. Neon has a warmer, more organic glow that some brands prefer for heritage or upscale positioning. If your brand identity specifically calls for that neon aesthetic, it’s worth the trade-off in operating cost and maintenance complexity.
Neon tubes are fragile and require careful handling. A single tube break requires a full replacement, and finding a skilled neon technician has become increasingly difficult. Neon transformers also fail more frequently than LED drivers, especially in humid climates like Dallas during summer months. If you choose neon, budget for more frequent maintenance checks and higher lifetime ownership costs.
We’ve found that hybrid approaches work well too. Some clients request neon tubes in the primary letters with LED accent lighting elsewhere, giving them the best visual qualities of both technologies while controlling overall cost. We can design this during the initial concept phase so everything integrates seamlessly.
What to do next: If you’re undecided, ask your designer to show you photos of both LED and neon versions of your proposed design. Visit nearby businesses at night and see which lighting style matches your brand better. For most Dallas businesses, LED offers the best balance of visibility, reliability, and operating cost.
4. Weather Sealing and Moisture Protection
Dallas humidity is relentless, especially during spring and summer. Even though our area doesn’t see heavy snow, the moisture-temperature cycles still degrade unsealed components. Water doesn’t have to flow; it infiltrates through tiny gaps, gets trapped inside letter cavities, and causes corrosion, LED degradation, and electrical failures.
We seal every seam where two pieces of the letter meet or where the letter attaches to its mounting bracket. We use silicone caulk rated for outdoor use and UV stability, not cheaper indoor caulk that hardens and cracks within two years. All entry points for power leads are sealed with compression glands or weatherproof connectors that allow the wire through without leaving a gap for water.
The letter faces themselves are typically made from aluminum, acrylic, or high-impact plastic. Aluminum is the strongest choice for larger letters and outdoor exposure. We use marine-grade aluminum alloys and either powder coat or anodize the finish to prevent oxidation. The backing panels where internal wiring and LED modules live are sealed with gasket material so moisture can’t seep in from the sides.
Drainage is equally important. We design letters so any water that does enter has a path out. Weep holes at the bottom of each letter allow condensation to escape, and we angle the back panels slightly so water runs off rather than pooling. Pooling water is how rust starts and how electrical components fail early.

For letters mounted on building facades, we also ensure the mounting brackets don’t create a “pocket” where water collects between the letter and the wall. We use spacers or standoff brackets that keep the letter slightly away from the wall surface, allowing air circulation and drainage.
What to do next: If you have an existing illuminated sign, inspect the base and sides for discoloration, caulk separation, or corrosion. These are early warning signs that moisture is getting inside. A professional resealing now can extend the sign’s life by several years.
5. Professional Installation Expertise Matters
Installation is where design meets reality, and small details determine whether a sign looks like a professional installation or an amateur project. We’ve seen beautiful letter designs ruined by installation teams who didn’t understand structural loading, didn’t seal properly, or didn’t run conduit neatly.
Professional installation means our team has the right tools and training. We use laser levels to ensure letters are perfectly horizontal and vertical. We pre-drill pilot holes rather than fighting fasteners into hard materials and stripping them out. We run all wiring in conduit so future electricians can easily access and replace components without disturbing seals or finishes.
Neatness isn’t cosmetic; it’s functional. Messy conduit runs leave gaps where water enters. Exposed fasteners oxidize and attract attention. Our team finishes every installation so the mounting hardware is concealed or color-matched, the wire runs are orderly, and the letters themselves are the focal point, not the installation.
We also understand building-specific challenges. If you’re in a brick historic building downtown, we know the permitting issues and the fastening standards. If you’re on a sloped parapet wall or a glass storefront, we’ve engineered solutions that other installers might avoid because it’s “too complicated.”
Post-installation, we test every circuit, verify every connection, photograph the installation for your records, and walk you through operation and basic maintenance. This handoff moment is where most customers feel either confident in their investment or worried they’ve missed something.
What to do next: When you’re evaluating a sign provider, ask about their installation team’s licensing and experience with channel letter signage specifically. Request references from recent outdoor illuminated sign projects. Visit a completed project at night to see the quality firsthand.
6. Maintenance and Long-Term Performance
A well-installed sign isn’t truly complete until you have a maintenance plan. We design our signs to be maintainable, which means you can replace LED modules, clean faces, or reseal seams without hiring a specialist for every small task.
We provide maintenance schedules that recommend quarterly cleaning for letters in dusty or high-traffic areas, annual electrical inspections, and a full caulk and seal assessment every three to five years. Cleaning is simple: soft brush, mild soap, and water. Never use abrasive cleaners that scratch faces or high-pressure washers that force water into seams.
LED modules rarely fail if they’ve been installed correctly and kept cool, but when they do, they’re easy to replace. We design our channel letters so LED boards are accessible from the back or from inside the letter cavity without removing the entire sign. We also stock common LED module types so replacements are available quickly if needed.

For signs with neon tubes, the maintenance burden is higher. Transformers need thermal monitoring, tubes need visual inspections for signs of gas loss (dimming), and the overall system should be checked annually. Neon has a shorter window of acceptable performance decline before replacement becomes necessary.
We also recommend electrical inspections every two to three years, especially after severe weather. High winds can loosen connections, and lightning storms can damage LED drivers even if they don’t directly strike the sign. An inspection identifies problems before they become visible failures.
What to do next: Schedule your first maintenance check 6 months after installation. This early check catches any installation issues that might have been missed and establishes a baseline for future comparisons. Keep detailed records of any repairs or maintenance so you have a history if issues emerge later.
7. Permit Navigation and Code Requirements
Dallas city codes and building standards govern signage installation, and getting it right from the start saves you headaches and rework later. Permits aren’t bureaucratic friction; they’re verification that your sign meets safety and zoning standards.
We handle permit navigation as part of our service, not as an add-on. We know the Dallas permit requirements for illuminated signs, the size restrictions in different zoning districts, the electrical code standards, and the structural engineering documentation needed for larger installations. We prepare permit submissions so approvals move quickly, and we coordinate with the city throughout the process.
One common issue is height and setback requirements. Some districts limit sign height or require signs to be set back from lot lines. These rules exist for safety and traffic visibility. We review your specific location’s zoning code before we design the sign so there are no surprises at permit submission.
Electrical work requires licensed electrician involvement depending on the scope. In Dallas, most sign electrical work requires a licensed electrician to be involved in design review and installation inspection, even if our team does the actual wiring. We ensure all electrical work is properly documented and inspected by city authorities.
We also verify building code compliance for structural loading. For signs mounted on buildings under 35 feet, basic wind load calculations usually suffice. For taller buildings or unusually large signs, we may need to involve a structural engineer. We handle these assessments upfront so installation proceeds without delays.
What to do next: Before you commit to a sign design, confirm your building’s zoning designation and ask your provider to review the sign against Dallas city codes specific to your location. This takes a day but prevents permit delays and potential requirement to remove or modify non-compliant signage later.
We’ve installed hundreds of illuminated channel letter signs throughout Dallas, and the installations that perform best and look best 5 to 10 years later all share these seven practices. Proper structural support keeps letters secure. Electrical planning keeps them safe and reliable. Smart material choices ensure longevity. Moisture protection prevents hidden failures. Professional installation makes everything work together. Maintenance schedules keep performance consistent. And permit compliance keeps you out of regulatory trouble.
When you’re ready to add channel letter signs to your storefront or refresh existing signage, we’re here to handle every part of the process. We design in-house, we fabricate the letters ourselves, and we install them with the care these practices require. Our 5-year quality warranty backs every installation, which means we’re confident these standards will deliver results.
Contact us today for a free consultation on your next illuminated signage project.